
HDR (High Dynamic Range) photography has been on my radar as a technique I have been wanting to try for a while.
In this post I wanted to detail how I processed one of my first HDR images (partly to help others looking to try it for the first time, but also as a reminder to myself as to what I did exactly). When it comes to post processing tools (be it Lightroom, Photoshop or other software) I’m the kind of person who pushes sliders, tweaks settings in a totally random manner hoping something works as I wanted. I needed to have a more focussed workflow.
Step 1 – Taking the shots
Although HDR results can be achieved from just 1 exposure (helps if you shoot in RAW), it’s preferable to shoot at least 3 different exposures. Sometimes you may want to shoot more, but bear in mind that more exposures will have the tendency to add noise to your final image.
For the image I’m attempting today, I took 3 exposures. The middle exposure was taken at f5 at 1/400th of a second. The 2 bracketed shots were +2ev and -2ev. There is no fixed rule to say it has to be in increments of 2 stops and will depend on the conditions – but from what I have read +2/-2 seems a good starting point.

Remember: When shooting HDR, select your required aperture (depending on the depth of field you want) and lock it as you don’t want the DOF to be different in each shot. Some cameras have auto bracketing built in, however I am still shooting with a Nikon DX40 and have to manually adjust. Just remember to put your camera on Aperture priority.
Other key considerations when shooting HDR is to stabilize your camera for taking the bracketed shots, preferably with a tripod, but resting on a surface or against a wall can work (particularly if you have a camera with auto bracketing feature). It also helps to use a shutter release cable or self-timer mode to prevent camera shake when depressing the shutter button.
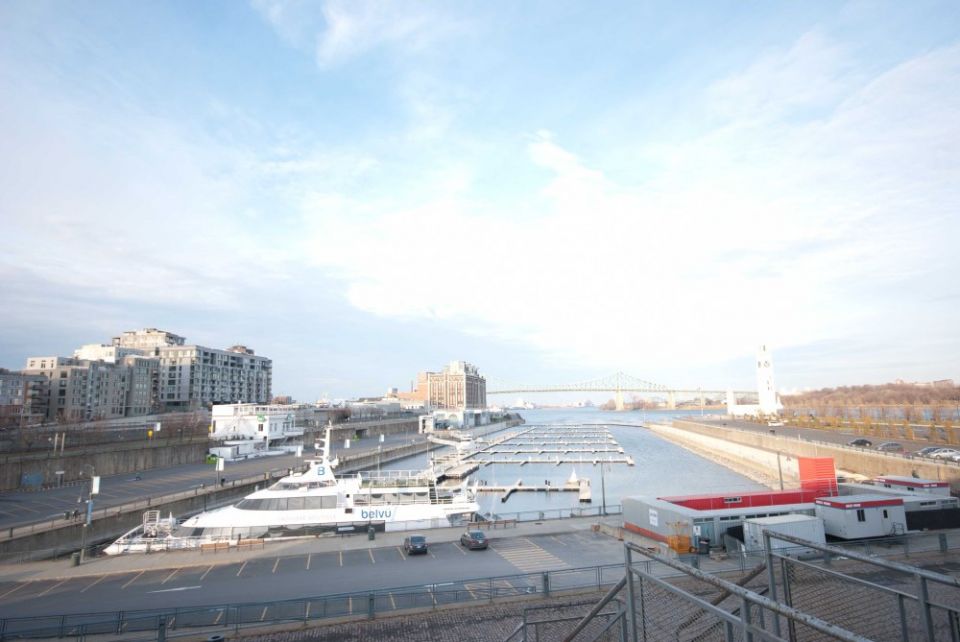
As a side note, for those interested in where this picture was taken, it’s looking East towards the Jacques Cartier bridge from the Labyrinthe Du Hanger 16 building in the Old Port of Montreal. If you walk down the East side of the Labrynthe building, you will see some staircases leading to the top floor and makes for a good vantage point.
Step 2 – Import your images into Photomatix
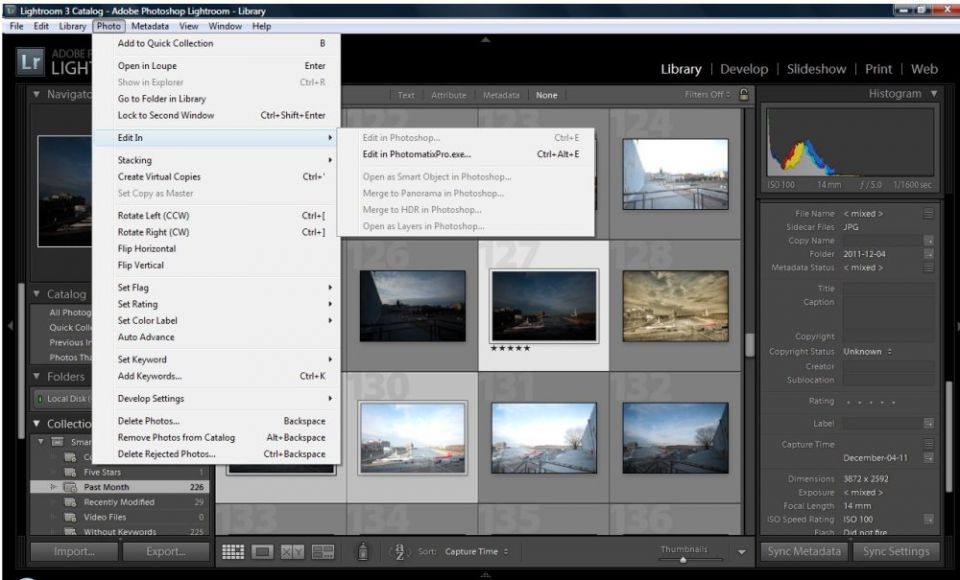
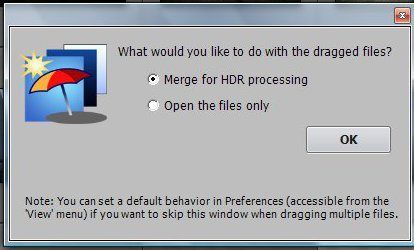
The first thing I did was to import the 3 raw files into Photomatix from Lightroom. (select photo>edit in>edit in Photomatix Pro.exe). Some people do some minor global adjustments in Lightroom before exporting, so maybe I will look at this as an additional step in the future.
I’m still using the trial version but will be looking to purchase this great software in the near future. The trial version adds watermarks to the final image, which unless you REALLY enjoy cloning out watermarks, 99$ is a pretty sweet price to pay. Anyway I digress…back to the job in hand.
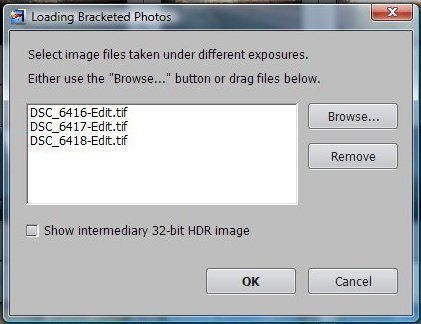
Simply follow the instructions on the pop up windows that will appear:
The next window will ask about alignment, ghosting, noise reduction and chromatic aberrations.

Alignment and Ghosting
Let’s take a look at each of these in turn:
- Align Source Images: This helps to ensure your images are all aligned with each other. Hopefully you took each image using a tripod and there was no camera movement between each image – if so, there should not be a problem. If there happened to be a slight movement, Photomatix will attempt to re-align. In any case, it is good to check the boxes.
- Remove ghosts: Ghosts are generally things like people or cars that moved through your frames. Because you are stacking the images, these will appear as ghost figures. Likewise if it was windy, you will find trees, flags etc appear as ghost images, so unless you want this effect, it’s always best to shoot on still days. Clouds and water can also be problematic, but can also sometimes produce nice effects. In my image I didn’t have anything moving, so for a first attemt I was pretty pleased not to have to try to de-ghost. I will revisit this issue in a future blog.
- Reduce noise: By combing multiple images some noise will be introduced, so probably good to check this option.
- Reduce chromatic aberrations: As with noise, Photomatix will attempt to remove any unwanted color “fringes” around highlights and dark areas in your image.
After selecting OK, a merged image will appear. Don’t be put off by how this looks, this is not the final merged result and is more for just viewing and highlighting any ghost artifacts etc.

Highlight Ghost Artifacts
Hit OK and Photomatix will begin to do its magic – can take a few minutes depending on what system you are running. Anyway, once done, you will start to get a feel for how your image is going to look…this is where the fun begins.

Let The Fun Begin
Step 3: Tweaking your final HDR image
Along the bottom of the screen you will see some pre-set styles that act as a good starting point depending on the look and feel you want to achieve…here is the gallery of what was produced for my image:
If you look at the left hand panel, this is where you fine-tune adjustments to the image. I decided to go with the Enhancer-Painterly preset. Depending on the pre-set you select, either tone mapping or exposure fusion will be selected on the top left panel under process selection. Each process offers different fine tuning options and by selecting each you will notice the panel below change.
Enhancer-Painterly is a tone mapped process, so for this tutorial I will be looking at the settings for tone mapping.
The preset result is not too bad, but there are a couple of fine adjustments that I decided to make:
| Setting | Preset | My Adjustment |
|---|---|---|
| Strength (enhances contrast and details) | 100 | 80 |
| Color Saturation (controls RGB saturation) | 50 | 30 |
| Luminosity (tonal range compression) | 6 | 7 |
| Detail Contrast (amount of contrast in details) | 6 | 9 |
This is what the image now looks like, but we still have a few more steps to go.
Below detail contrast are some lighting adjustment settings. You can try the presets ( that will change the look of the image from a more natural look to surreal). Below shows how each affected my image.
Alternatively, by unchecking the lighting effects mode box, you can adjust the slider to achieve the desired effect. For my image, I adjusted from the default 0 setting to -5.5.
Below lighting adjustments, you have some more options with sliders:
Smooth Highlights: Reduces contrast enhancements in white highlights and can help reduce the dreaded halo effect.
White Point: Helps reduce clipping in highlight areas or increase global contrast.
Black Point: Sets the minimum value of the tone mapped image. Use to increase global contrast or reduce shadow clipping.
Gamma: Adjusts the mid-tones resulting in brightening or darkening the image globally.
Temperature: Adjusts the color temperature of the tone mapped image.
The only change I made was to make the image a little warmer by moving the Temperature slider to the right.
Okay, here is what the image now looks like.

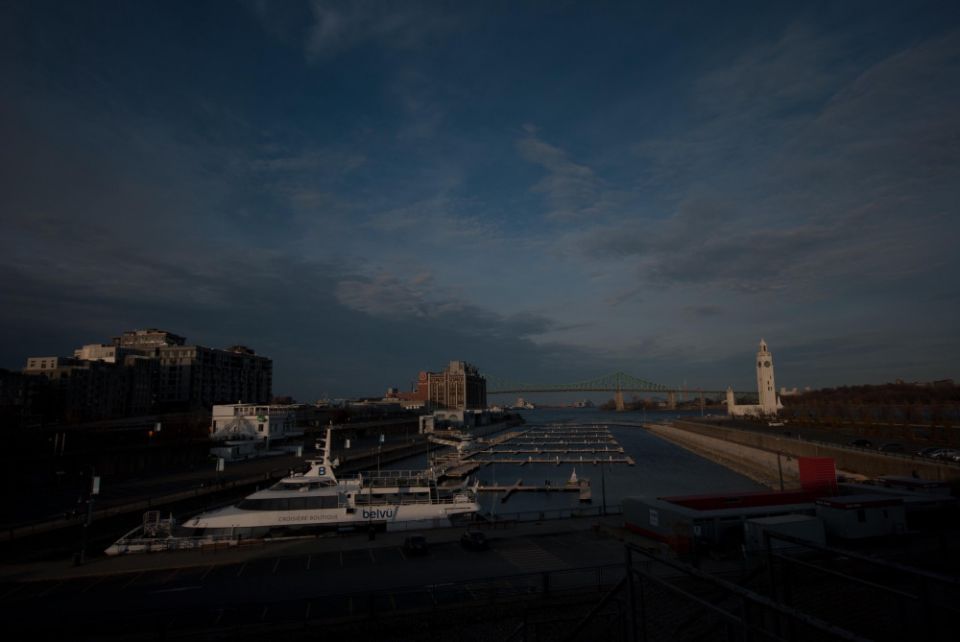
Final Result
Once you are happy with the result, go ahead and click “process” and save the image.
Step 4: Clean up in Lightroom
The final step is to bring the image back into Lightroom to make any final changes necessary.
For this image, I decided to darken the upper part of the image using a gradient, used the curve tool to boost the highlight areas slightly and added a vignette.
Voila, here is the before and after:

Original

Final
I think I pushed the processing a bit far, but as a first attempt I was quite happy with the outcome and was a great learning experience in what Photomatix is capable of and will certainly be purchasing a copy and looking forward to further experimentation.
Should you be looking to buy a copy of Photomatix yourself, check out Trey Ratcliff’s site for a coupon code that will (at least at time of writing this post) get you a discount. Trey is the Master of HDR and as well as making great images, provides lots of tutorials on the matter and has done a great review of Photomatix Pro. His tutorial also covers an advanced step using Photoshop tools – something else for me to look at and cover in a future post.
If you are into HDR, do share any thoughts, tips and links to your work below.
Thanks for stopping by. Until next time.
– Martin
Related Images:


